| Food Blog by Arie
I have been waiting to make this type of post for “The Best Gooey Mac and Cheese” you will make over and over. It took me a few times to kind of perfect this recipe.
1. Cook the Pasta
Boil your noodles in salted water until just al dente. Don’t overcook—remember they’ll keep cooking in the oven. Drain and set aside with a drizzle of butter to keep them from sticking.
2. Make the Roux (Base Sauce)
In a large skillet or deep saucepan, melt ½ stick of butter over medium heat. Once melted, whisk in 2–3 tablespoons of flour to form a smooth paste—this is your roux, the base for that silky cheese sauce.
Now it’s time to bloom your seasonings: this means gently warming your spices (garlic powder, onion powder, smoked paprika, cayenne, and salt) in the butter and flour. Blooming wakes up their natural oils, deepening their flavor so your sauce tastes richer and more aromatic. Add about half of your seasonings into the roux and stir for 30–60 seconds until fragrant.
3. Add the Creamy Goodness
Slowly whisk in evaporated milk and heavy cream. Keep stirring until the mixture thickens slightly—smooth and velvety. Once it starts to bubble, sprinkle in the remaining half of your seasonings for that full-bodied flavor.
4. Add the Cheese (and Turn Off the Heat!)
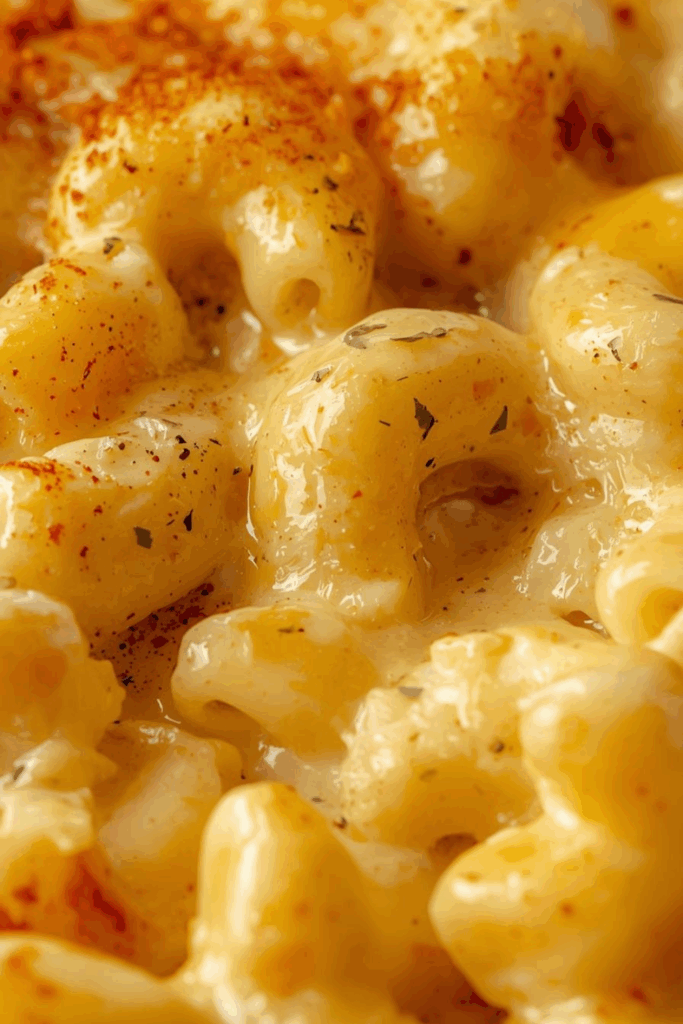
Turn the heat off before adding your cheese—this keeps it from burning or becoming grainy. Stir in half of your grated cheese blend until it melts into an ooey-gooey, velvety sauce. You’ll know it’s right when your spoon glides through cheesy gold.
5. Combine and Layer
Pour your cooked noodles into the cheese sauce and stir gently until every piece is coated. In a buttered baking dish, pour half of the cheesy pasta, sprinkle a layer of reserved cheese, then add the rest of the pasta and top with the remaining cheese. That’s where the magic crust forms!
6. Bake to Golden Glory
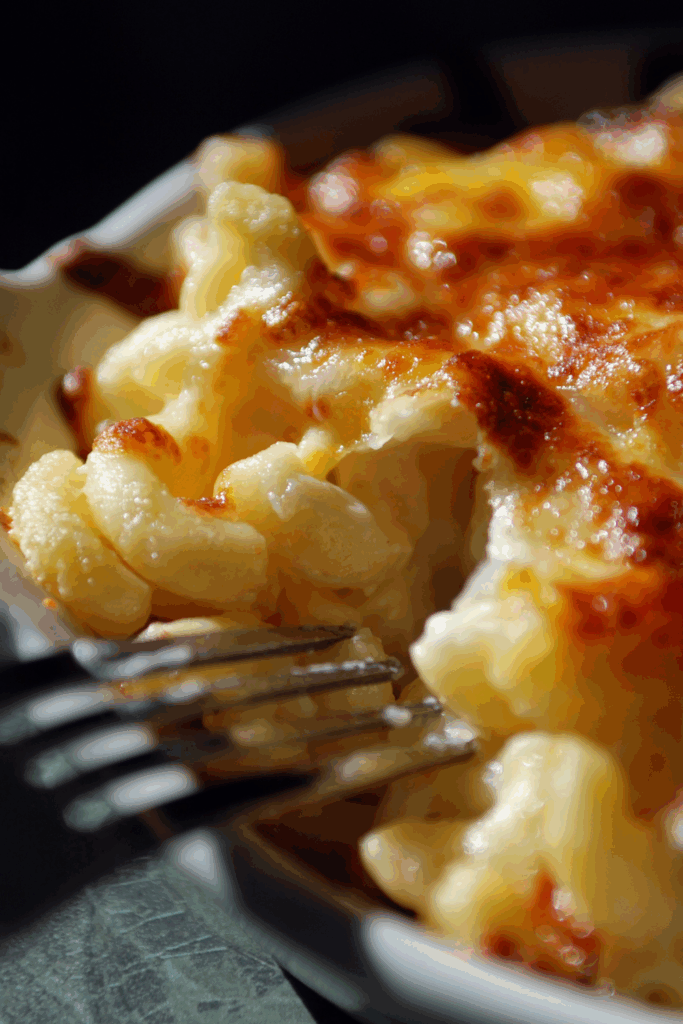
Bake uncovered at 350°F for 25–30 minutes until the top is bubbling, golden, and slightly crisp. Keep an eye on it near the end—you want that perfect caramelized top, not a burnt one.
Let it rest for 5–10 minutes before serving (if you can wait!). That creamy, gooey cheese will thicken slightly as it cools, making every bite pure comfort food bliss.
Pair with roasted veggies, BBQ chicken, or just a fork and a quiet moment—it’s that good.
I am hosting Thanksgiving this year, and I have been wrestling with my recipes, and I have also been practicing with what recipes I want to pair with all my dishes. My family is not super judgmental, but I will be the person who will not introduce any new dishes this Thanksgiving, but I will practice, though.

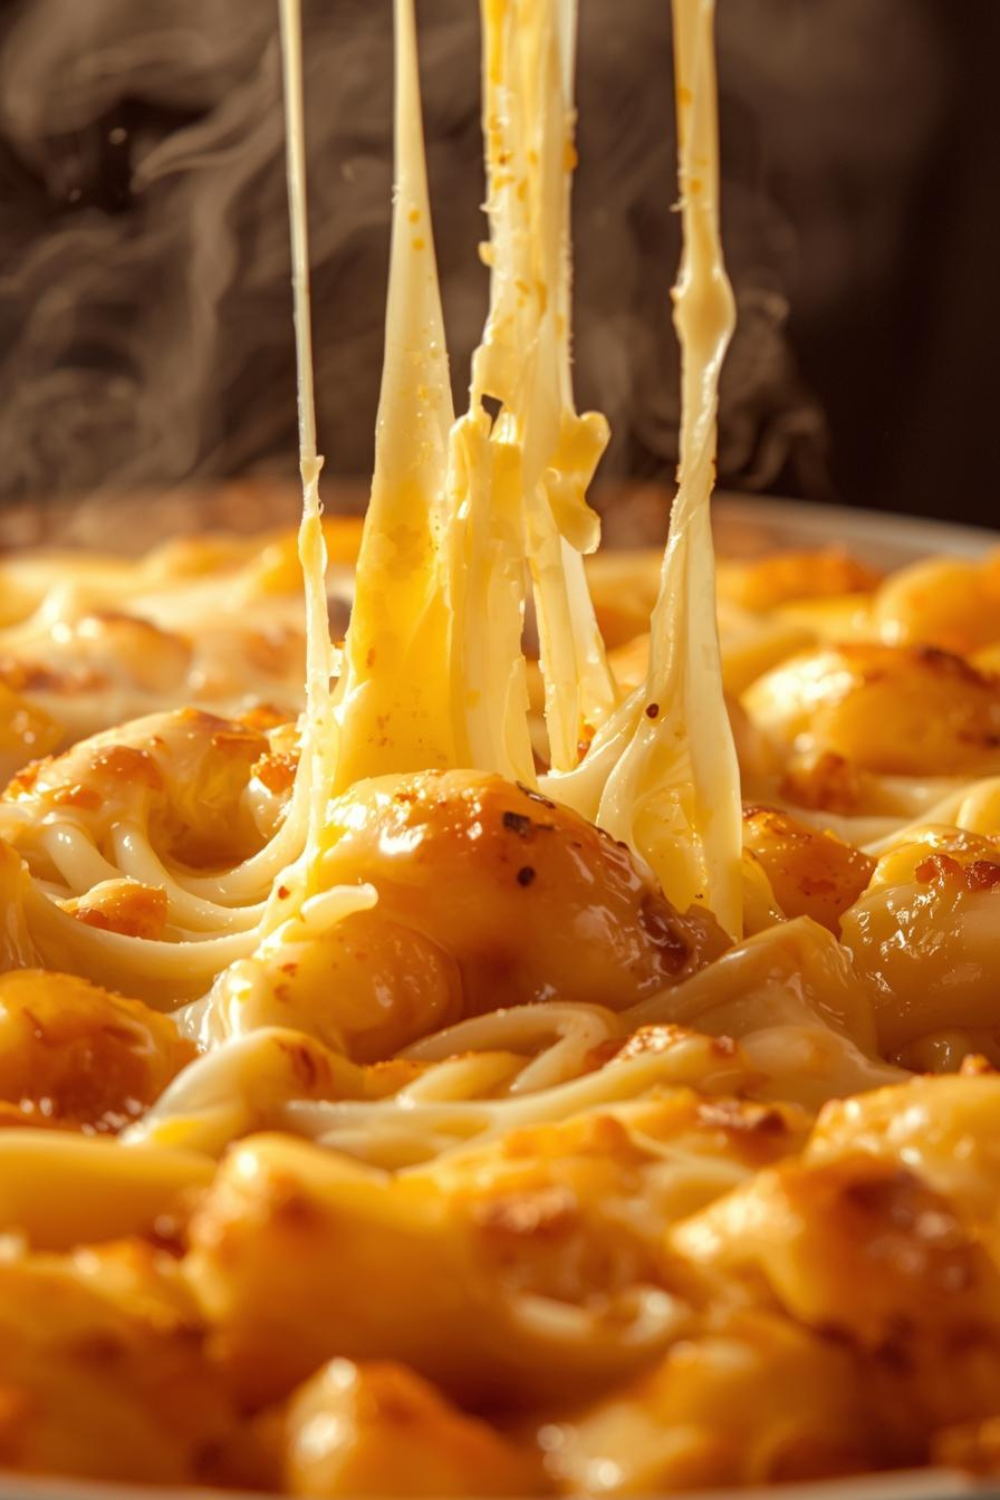
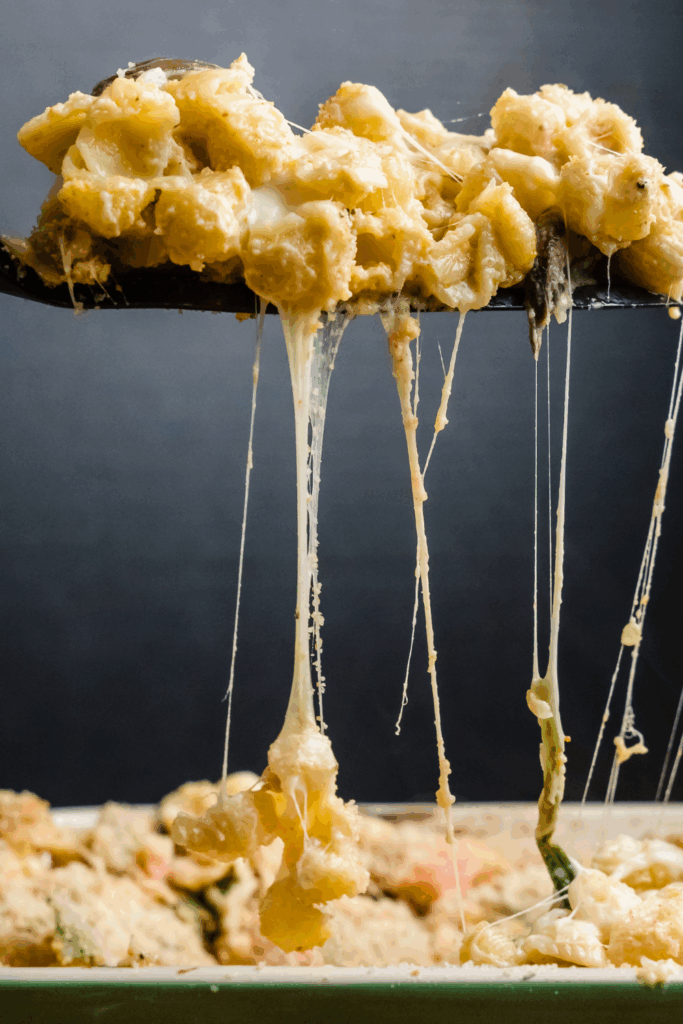
You definitely want to start with the right cheese combo that will give you that cheese pull, especially in the photo you see above. I have gone 100 times around this block with the best cheeses I could find for my mac and cheese. I have to say the cheeses do matter, but I will always say shred your own cheese for this “The Best Gooey Mac and Cheese.” It is worth the weight in gold to shred your own, BUT I must say I have seen people do the bagged cheese too, and it turned out just as amazing!!
Here are my cheese options and why:
This combo keeps your mac from tasting flat and gives that luscious, gooey texture people love in Pinterest food reels.
2. Shred your own cheese. I said this above, you would probably enjoy your food more if you shred your own cheese. We are NOT going to say the shredded is bad to use, but it has a lot more coatings on it that don’t allow it to maximize its melt effect. I have done both, and I prefer to shred my own.
3. Bloom Those Spices: Make sure to bloom those spices I shared in the recipe, it makes a world a difference so that you aren’t biting into raw spices while eating. They all taste very well blended.
4. Choosing The Right Cheeses. Earlier, I gave cheese recommendations to help you choose the cheeses that will give you the dreamiest mac and cheese you could ever find. I love all the cheeses listed, and they will not do you wrong.
5. Don’t overheat the cheese sauce. Once the cheese goes in, turn off the stove. High heat can cause it to break or turn grainy. Gentle stirring is all it needs to become silky and luscious.
6. Layer for the Win. Make sure you layer those cheeses to get the best cheese pull you have ever seen. The cheese pull is all worth it, and I make sure to have a good reserve for me to sprinkle on when I am done.
7. Let It Rest Before Serving. Make sure to give this some time to set, so this can set up slightly. You need this to set up so that you don’t have molten lava. Also, you get the most beautiful cheese pull.
Multiple Cheeses: Try combining sharp cheddar, gouda, fontina, and mozzarella for depth and stretch.
Smoked Cheese: Add a touch of smoked cheddar or provolone for that subtle, campfire-style flavor.
Parmesan Finish: Sprinkle grated Parmesan right before baking for a salty, golden crust.
I would definitely serve my juicy baked chicken with it, find that here. I could think of so many things to serve with it.